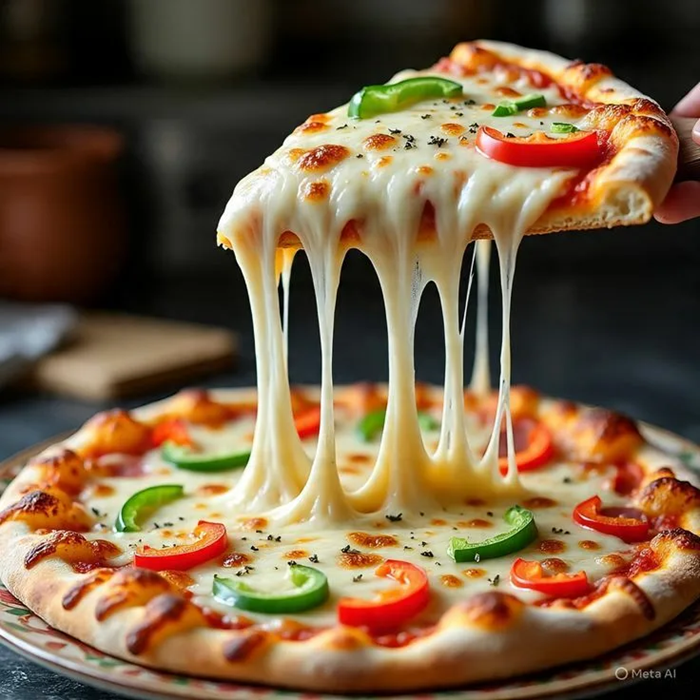
Food photography is a way to convey flavor through visual details: the texture of the crust, the clarity of the broth, the sheen of the glaze, the tenderness of the crumble. A successful shot acts as an invitation: the viewer understands that the dish is fresh, appetizing, and prepared with care.
To achieve consistent results, it’s important to organize the process: prepare the lighting, consider the composition, select props, and control the “vitality” of the product in the frame. Below are practical rules that will help you shoot accurately and expressively, without wasting time on chaotic rearrangements.
Photography and Food Styling: How to Create Appetizing and Honest Photos
Angle determines what you’re showing:
- From above (flat lay) – ideal for breakfasts, pizza, salads, sets, and table settings.
- At 45° – a universal option: both the shape and the top of the dish are visible.
- At dish level – good for burgers, cakes, glasses, and layered desserts.
Choose one dominant angle for the series so the photos look cohesive. Mix angles consciously: for example, a general overhead shot and one “heroic” profile shot.
Textures and details: what “sells” flavor
Appetizingness is created by micro-details: grains of salt, steam, drops of sauce, crispy crumbs, meat fibers, and bubbles of cream. Add them carefully and selectively. A surface that’s too perfect can look plasticky, so a little natural “sloppiness” often works better.
Keep an eye on freshness: greens darken, ice cream runs, drinks lose condensation. Shoot quickly, preparing the frame in advance, and keep spare elements (leaves, berries, sauce) on hand for replacement.
Color: Balance and Accents Without “Acidity”
Focus on 2-3 key color points. For example: a warm background, a neutral plate, and one bright ingredient (berries, greens, citrus). If the frame seems “flat,” add contrast: a dark board under light-colored baked goods or a light napkin next to a dark sauce.
When editing, avoid over-saturation: natural tones inspire confidence. It’s better to slightly increase the light and micro-contrast than to crank up the color to an unnatural level.
Mini-Checklist Before Pressing the Button
If you want to improve your photography faster, it’s helpful to repeat the same scene, changing only one parameter: angle, background, or reflector. This approach is often called lavradar food styling photography – it helps you see cause-and-effect relationships and achieve predictable results.
Bottom Line: Lighting Without Blowouts Is Control, Not Power
Choose one main light, soften it with a diffuser, and add a reflector only to fill in the shadows. Shoot with a little extra highlights: it’s easier to slightly lift shadows in post-processing than to restore “blown out” areas on icing, sauce, and whiteware.
Checklist before shooting
- Identify the key light: a window or lamp – one main source to avoid double glare.
- Rotate the setup relative to the light: change the angle of the subject and camera until the glare becomes controlled (especially on spoons, glasses, icing).
- Soften the light: use a tulle/diffuser on a window or a softbox/diffuser on a lamp to make the glare wide and not burn out the texture.
- Add a reflector sparingly: move it closer to softly fill the shadows, move it away if the image becomes flat.
- Protect highlights: check for blown highlights on the brightest areas (white plate, cream, powdered sugar, gloss).
- Stabilize the color: when Keep the lamp focused on one type of light source and set the white balance to match it to prevent the food from taking on unwanted tones.
- Window: The best option for natural volume is to place the dish sideways to the light, soften it, and add a reflector on the opposite side.
- Lamp: Use diffusion and a fixed position to repeat shots; don’t mix with daylight unnecessarily.
- Reflector: This isn’t a “second light,” but a tool for precise shadow correction; it moves centimeters but noticeably changes the image.
The main rule: first achieve beautiful highlights and shadows from one light source, and only then carefully “support” the image with a reflector. This way, the food will look appetizing, textures will be legible, and highlights will remain vibrant, without blown out highlights.